We haven't had the opportunity to review too many products from Sig Sauer, but that's not to say that we haven't wanted to. If you remember our First Look at the Sig P220 in .45ACP, we had some good things to say for the build quality and reliability, but we didn't spend much quality time with the P220.
Since then, I've become rather fond of my Glock 22, given that it's been on my hip nearly every day for the past 5 years or so, and I've put thousands of rounds through the pipe. Recently, I had a chance to switch things up a bit, and purchased a Sig P229. It has a lower capacity (12+1 vs. 15+1 in my Glock), it's heavier (29.6 ounces empty with mag, the Glock is 4 ounces lighter at 25.6 ounces empty), and costs significantly more, but it's slightly smaller than the Glock, and seems a little easier to conceal, given the shorter grip. The P229 has an MSRP of $1,015, where the Glock 22 (Gen 4) has an MSRP of just $649. That said, MSRP is merely that; Manufacturer's Suggested Retail Price. Glock, Sig, H&K, it doesn't really matter the make, the point is that deals can be found everywhere, and I paid a bit less for this particular firearm. I've always been fond of purchasing used firearms, as I've done for years, and I've never had a single issue with any of my pre-owned firearms; That, however, is another topic entirely.
I'm not saying the Glock is superior to the Sig in any way, merely mentioning the advantages of the Glock over the Sig. That said, the Sig just feels different. It has a balanced feel, and the quality is quite obviously top-notch. There is a slight chatter when shaking side-to-side, but in a firearm with an all-metal construction, this is to be expected. The noise was not noticeable in normal operation, or when holstered, only when the pistol was deliberately moved in a vigorous way. Despite the noise, the tolerances are tight, and our inspection revealed no manufacturing defects.
I've been carrying the Sig off-and-on for around a year now, and it's been a fantastic companion. It's heavy, but not obtrusively so; you'll know it's there, but it's not cumbersome in any way. This one lives in an OWB "paddle" holster most of the time, which isn't quite as easy to conceal as my IWB holster for the Glock, but it serves it's purpose. One point worth mentioning, holsters for the Sig aren't as common in many of the local shops I've been to, simply due to the fact that the Sigs aren't quite as plentiful as the Glocks, Springfield XDM's, and S&W M&P's. They are out there, but make sure you look online, as the selection is much better through online retailers.
At the range, the Sig is a solid performer. As I mentioned above, I've got a solid connection with my Glock, but the Sig felt just as natural, although I did have to compensate for the slight difference in grip angle between the two, as I tended to aim a bit high at first. After a few rounds, however, things started to really come together. Groupings at 25 yards were a bit tighter than the Glock, but both were acceptable for a sidearm. Mag changes weren't difficult, but I did find the magwell wasn't quite as "smooth" as on some other pistols - there were several ridges near the well opening that the mag could get caught. That said, the magwell opening is flared to prevent snags from happening while reloading, and I didn't notice any glaring difficulties.
Test ammunition was Remington "White Box" 165 grain FMJ, and I fed about 5 magazines through the Sig, around 60 rounds. The slight increase in weight, and more balanced feel when compared to most polymer frame pistols, help with managing recoil. No performance issues occurred, all rounds chambered, fired, and ejected properly. The Sig was a great performer, and an absolute pleasure to shoot. The model I purchased is SA/DA with an exposed hammer, and the trigger is even with a smooth break. Trigger pull weight is 10 pounds in single action, 4.4 pounds in double action.
Pros: Accuracy is as good as expected, fit and finish is superb, and operation is simple and intuitive for most enthusiasts.
Cons: Additional weight when compared to polymer frame pistols, cost is substantially higher.
The Final Word: There's not much bad to say about most of the offerings from Sig Sauer that I've personally handled. I find that I'm always more worried about damaging the finish when carrying the Sig, simply due to the cost and it's pristine condition (compared to my "beater" Glock). If you're looking for a solid mid-size pistol, and prefer an alloy or stainless steel construction over the polymer frames, look no further. Be warned, however, as Sigs seem to want company, and you'll likely start looking longingly at the P229's siblings through the glass at your next visit to the local gun shop.

Sunday, November 5, 2017

Monday, January 20, 2014
First Look: Streamlight TLR-1s Weapon Light
This isn't exactly a "First Look," since I've had the item being reviewed mounted to my duty weapon for over a year now, but I realized I hadn't had a chance to share my thoughts on it.
First of all, I'll preface the actual review with a bit of a warning: If you choose to use a weapon-mounted light of any kind, it is highly recommended that you take advantage of the plethora of instructors out there, and seek some form of training in the proper deployment of the light in conduction with whatever types of encounters you foresee using it in. That's my opinion, of course, and I found the training I received in the proper use of a weapon light to have been invaluable. Using any kind of light in a low-light tactical situation carries a number of risks, most notably in revealing your position to an unknown attacker. Many training courses offer a number of different techniques for employing a light source to your advantage, which can prove invaluable.
First of all, the packaging was minimal, yet adequate. My TLR-1s was packaged in a simple molded plastic clamshell, inside of a branded cardboard box. All of the pieces were kept in place, and everything was visible before opening the package. Nothing was damaged in transit, the packaging was adequate to prevent damage in shipping, and the item worked as intended straight out of the package.
Included in the package, we have the light, a pair of CR123 batteries (commonly referred to as "Streamlight Batteries"), and a plastic bag containing adaptors to allow the light to work with different brands of pistols, given the subtle inconsistencies in grooving in most pistol rails. Assembly was simple, as the Glock adaptor was already installed in the light, so all I had to do to get the light mounted and working on my Glock 22 was install the batteries, clip it on the rail, and tighten the screw. I have heard that some generations used a different type of fastener to secure the light to the rail, but mine uses a simple screw with a slot for using a coin or other implement to tighten/loosen. Installation took 30 seconds, and required no instructions. Battery replacement requires removing the light from the weapon, which is a positive factor in my opinion, as the batteries aren't going to fall off during normal use, provided the light is securely fastened.
Streamlight advertises this light as producing 300 lumens of light output, which I can't confirm, as I don't have the technical equipment to do so in my garage. I will, however, state that this is a VERY bright light, more than adequate for any tactical use you may have for it. Light output is comparable to my upgraded Surefire 6P, with a slight perceptible advantage to the Surefire, due entirely to the upgrades made after purchase.
Using the TLR-1s is easy, as the controls are rather intuitive. There is a "butterfly" type rotating switch, which allows for control of the light with either hand. I prefer to activate the light with my support-hand thumb, as this keeps my trigger finger unoccupied, and I find that I can activate the light more accurately that way, particularly when using the strobe feature. To turn the light on, you can move the switch one way for momentary, the other way for steady on. To activate the strobe feature, simply double-tap the switch to momentary on, holding it down on the second tap. I've only ever used momentary on for situations requiring a weapon drawn in the past, so I rarely use the "steady on" function. The strobe feature is useful for disorienting attackers in low-light and no-light environments, although I do not recommend using it without receiving some form of training first, for reasons mentioned above.
Durability is impressive. I've had the TLR-1s mounted to my Glock 22 .40 caliber pistol for over a year, and I've taken it to the range at least a dozen times, qualified with it at work twice, and conducted several firearms training events with it. The Streamlight has performed flawlessly. The body is made of anodized machined aluminum, and despite the heavy use it's received in my possession, the light still looks mostly as it did out of the box. One adverse effect I've noticed, is that since the front of the unit protrudes farther than the front of the barrel of the Glock, it gathers excess carbon buildup at a pretty high rate. It's not usually enough to interfere with light output, but I've noticed some discoloration of the bezel around the light, particularly the chrome accent ring between the light bezel and the rest of the unit, but this is purely aesthetic, not affecting the function of the product in any way.
To compound on the durability of this light, I've been told by a number of people that it's not a good idea to install a weapon-mounted light to a Glock .40 caliber pistol, because the recoil alone is known to have caused light failures, and others have reported weapon lights causing weapon malfunctions. I've noticed no adverse effects in either the light or the gun, despite hundreds of rounds being fired, and the light only being removed for cleaning after a trip to the range. I'd venture that I've fired close to 1500 rounds since mounting the light.
I purchased the TLR-1s for $120 from a local gun shop, but they have been seen going for $99 on Amazon.com, plus shipping, and I've seen some even better deals popping up around the 'net. Also, you can find a number of accessories for the TLR-1s, including remote switches for long guns, and a very neat "contoured remote switch" for Glock pistols, which allows control of the light with the strong-hand middle finger. The accessories available for the TLR-1s are also compatible with the TLR-1, and may be compatible with the TLR-2 and TLR-2s, although you should verify before purchasing.
Overall, if you're in the market for a weapon-mounted light, I strongly suggest taking a look at the TLR-1s. It's a solid light that comes with a limited lifetime warranty, is easy to use, and includes hardware to mount on most rail-equipped pistols manufactured in the last 10 years. It can also be used on a MIL-Standard rail, if you choose to mount it on an AR15 or other similar weapon, although I'd recommend taking a look at the TLR-1s HP for that purpose, which is essentially the same light, with a larger reflector and bezel, allowing for more effective light patterns consistent with longer distances that you may encounter using a rifle, versus the closer quarters of engagement you will see with a standard service pistol. This is not the only weapon light out there, far from it, but it's solid, and is comparable in quality to all of its competition.
As always, if you have any questions or comments, let us know! You can leave a comment here, with no registration necessary, post up on our Facebook page, or shoot us an email at thelowready@gmail.com. We hope to have some pictures to share in the near future, so be sure to check back with us!
First of all, I'll preface the actual review with a bit of a warning: If you choose to use a weapon-mounted light of any kind, it is highly recommended that you take advantage of the plethora of instructors out there, and seek some form of training in the proper deployment of the light in conduction with whatever types of encounters you foresee using it in. That's my opinion, of course, and I found the training I received in the proper use of a weapon light to have been invaluable. Using any kind of light in a low-light tactical situation carries a number of risks, most notably in revealing your position to an unknown attacker. Many training courses offer a number of different techniques for employing a light source to your advantage, which can prove invaluable.
First of all, the packaging was minimal, yet adequate. My TLR-1s was packaged in a simple molded plastic clamshell, inside of a branded cardboard box. All of the pieces were kept in place, and everything was visible before opening the package. Nothing was damaged in transit, the packaging was adequate to prevent damage in shipping, and the item worked as intended straight out of the package.
Included in the package, we have the light, a pair of CR123 batteries (commonly referred to as "Streamlight Batteries"), and a plastic bag containing adaptors to allow the light to work with different brands of pistols, given the subtle inconsistencies in grooving in most pistol rails. Assembly was simple, as the Glock adaptor was already installed in the light, so all I had to do to get the light mounted and working on my Glock 22 was install the batteries, clip it on the rail, and tighten the screw. I have heard that some generations used a different type of fastener to secure the light to the rail, but mine uses a simple screw with a slot for using a coin or other implement to tighten/loosen. Installation took 30 seconds, and required no instructions. Battery replacement requires removing the light from the weapon, which is a positive factor in my opinion, as the batteries aren't going to fall off during normal use, provided the light is securely fastened.
Streamlight advertises this light as producing 300 lumens of light output, which I can't confirm, as I don't have the technical equipment to do so in my garage. I will, however, state that this is a VERY bright light, more than adequate for any tactical use you may have for it. Light output is comparable to my upgraded Surefire 6P, with a slight perceptible advantage to the Surefire, due entirely to the upgrades made after purchase.
Using the TLR-1s is easy, as the controls are rather intuitive. There is a "butterfly" type rotating switch, which allows for control of the light with either hand. I prefer to activate the light with my support-hand thumb, as this keeps my trigger finger unoccupied, and I find that I can activate the light more accurately that way, particularly when using the strobe feature. To turn the light on, you can move the switch one way for momentary, the other way for steady on. To activate the strobe feature, simply double-tap the switch to momentary on, holding it down on the second tap. I've only ever used momentary on for situations requiring a weapon drawn in the past, so I rarely use the "steady on" function. The strobe feature is useful for disorienting attackers in low-light and no-light environments, although I do not recommend using it without receiving some form of training first, for reasons mentioned above.
Durability is impressive. I've had the TLR-1s mounted to my Glock 22 .40 caliber pistol for over a year, and I've taken it to the range at least a dozen times, qualified with it at work twice, and conducted several firearms training events with it. The Streamlight has performed flawlessly. The body is made of anodized machined aluminum, and despite the heavy use it's received in my possession, the light still looks mostly as it did out of the box. One adverse effect I've noticed, is that since the front of the unit protrudes farther than the front of the barrel of the Glock, it gathers excess carbon buildup at a pretty high rate. It's not usually enough to interfere with light output, but I've noticed some discoloration of the bezel around the light, particularly the chrome accent ring between the light bezel and the rest of the unit, but this is purely aesthetic, not affecting the function of the product in any way.
To compound on the durability of this light, I've been told by a number of people that it's not a good idea to install a weapon-mounted light to a Glock .40 caliber pistol, because the recoil alone is known to have caused light failures, and others have reported weapon lights causing weapon malfunctions. I've noticed no adverse effects in either the light or the gun, despite hundreds of rounds being fired, and the light only being removed for cleaning after a trip to the range. I'd venture that I've fired close to 1500 rounds since mounting the light.
I purchased the TLR-1s for $120 from a local gun shop, but they have been seen going for $99 on Amazon.com, plus shipping, and I've seen some even better deals popping up around the 'net. Also, you can find a number of accessories for the TLR-1s, including remote switches for long guns, and a very neat "contoured remote switch" for Glock pistols, which allows control of the light with the strong-hand middle finger. The accessories available for the TLR-1s are also compatible with the TLR-1, and may be compatible with the TLR-2 and TLR-2s, although you should verify before purchasing.
Overall, if you're in the market for a weapon-mounted light, I strongly suggest taking a look at the TLR-1s. It's a solid light that comes with a limited lifetime warranty, is easy to use, and includes hardware to mount on most rail-equipped pistols manufactured in the last 10 years. It can also be used on a MIL-Standard rail, if you choose to mount it on an AR15 or other similar weapon, although I'd recommend taking a look at the TLR-1s HP for that purpose, which is essentially the same light, with a larger reflector and bezel, allowing for more effective light patterns consistent with longer distances that you may encounter using a rifle, versus the closer quarters of engagement you will see with a standard service pistol. This is not the only weapon light out there, far from it, but it's solid, and is comparable in quality to all of its competition.
As always, if you have any questions or comments, let us know! You can leave a comment here, with no registration necessary, post up on our Facebook page, or shoot us an email at thelowready@gmail.com. We hope to have some pictures to share in the near future, so be sure to check back with us!
First Look: Magpul AFG
Well, I know this may not be as exciting for some of you as it is for me, but I acquired a Magpul AFG (Angled Fore Grip) from a friend over the holidays, and it has since been mounted on my AR15. Previously, I had used a simple and inexpensive vertical fore grip, and honestly, it was useful, but I thought the AFG was a better fit for me, having held a rifle equipped with one previously.
Packaging was simple, the item was inside a clear plastic bag, which was neatly packaged in a clearly marked small cardboard box. Nothing fancy, this is a very durable item, so unnecessary precautions weren't taken in preparing it for shipping. It was clean and undamaged, and all of the parts were already in place. Speaking of parts, the Magpul AFG has only three: The main component, which is essentially a piece of composite material, a nut, and a screw, which attach the grip to the rail.
Installation was simple. Remove the screw, slide the grip onto the rail, position it where you want it, reinsert the screw, and tighten. Installation shouldn't take more than a minute, even if you have other rail-mounted accessories that you need to remove first.
I can't really speak on increased accuracy or any other quantifiable improvements since installing the AFG on my rifle, although it felt much more comfortable. That is purely a subjective analysis, however, and since this is largely a matter of preference, the best I can say is to give it a try. I'm not going to spin a web of deception and tell you it'll make you a better marksman, or explain some completely fabricated theory about how this product will decrease back pain or increase the resale value of your home. I can't endorse the product as a "Must Have" for everyone, because not everyone is going to like it. There's not really much else to be said about it.
Check back soon, I'll be sharing some pictures of the AFG in the coming days. If you have any questions about this, or any other articles featured on The Low Ready, give us a shout in the comments below, on our Facebook page, or in an email to thelowready@gmail.com.
Thanks for stopping by, and we look forward to reviewing more fun and exciting products throughout 2014!
Packaging was simple, the item was inside a clear plastic bag, which was neatly packaged in a clearly marked small cardboard box. Nothing fancy, this is a very durable item, so unnecessary precautions weren't taken in preparing it for shipping. It was clean and undamaged, and all of the parts were already in place. Speaking of parts, the Magpul AFG has only three: The main component, which is essentially a piece of composite material, a nut, and a screw, which attach the grip to the rail.
Installation was simple. Remove the screw, slide the grip onto the rail, position it where you want it, reinsert the screw, and tighten. Installation shouldn't take more than a minute, even if you have other rail-mounted accessories that you need to remove first.
I can't really speak on increased accuracy or any other quantifiable improvements since installing the AFG on my rifle, although it felt much more comfortable. That is purely a subjective analysis, however, and since this is largely a matter of preference, the best I can say is to give it a try. I'm not going to spin a web of deception and tell you it'll make you a better marksman, or explain some completely fabricated theory about how this product will decrease back pain or increase the resale value of your home. I can't endorse the product as a "Must Have" for everyone, because not everyone is going to like it. There's not really much else to be said about it.
Check back soon, I'll be sharing some pictures of the AFG in the coming days. If you have any questions about this, or any other articles featured on The Low Ready, give us a shout in the comments below, on our Facebook page, or in an email to thelowready@gmail.com.
Thanks for stopping by, and we look forward to reviewing more fun and exciting products throughout 2014!
Saturday, January 18, 2014
Words of Wisdom-The Rules of Firearm Safety
Now, before we begin, I'd like to mention that this post is going to be much less formal than the others. I'm not reviewing any products, I'm not describing the ballistics of a specific weapon, ammunition, etc. I'm simply going to cover the basic principles of firearm safety. We all know the "fundamentals", the list of rules in circulation that everyone has heard at one point or another. My first exposure was my first week of Basic Training, the first time I had ever held a firearm. I don't remember "hearing" the fundamentals of firearm safety, so much as I recall having them forcibly pounded into my cranium, through my "brain bucket," with the buttstock of a figurative M16A1. . . I'm going to forego my spotty recollection of a possibly traumatic experience, and move on to the "meat and potatoes."
I will also preface this by saying that the purpose of this post is mostly as a reminder to those of you who have some experience. Newcomers to the hobby can still learn something, but the stories relayed below will be based mostly on my experiences with the inexperienced shooters I've had to "gently" remind of the rules while at the range, in firearms training classes, and the like.
Rule #1: It's a Lethal Weapon, you idiot!
Until you've had these rules explained to you, if you've never handled a firearm before, it's unlikely that the "4 rules" are at the front of your mind. The first time I handled a firearm, I think the only thought I can remember was, "This is so cool! I wonder when we're going to get to shoot these things!" The last thing on my mind was the power of the weapon, and I was SO sure that it was unloaded, I really didn't care where I pointed the muzzle. Well, for a minute, anyway. If there's anything my time in the military has taught me, it's to always treat the weapon as if it's loaded, even when I'm sure it's not. There are too many stories about people who have had negligent discharges while handling firearms, we don't need any more.
Rule #2: Don't point that thing at me!
It doesn't matter how many times you tell someone this rule, they will always forget. We need to be attentive at all times, especially with those who have little or no experience. I have done firearms qualifications for employees of the company I'm employed by, and it seems that no matter how many times I've said it, someone always has a loaded gun pointed at them when we get to the firing line. Usually, it's me. That's why I wear a vest, and carry a hefty life insurance policy. The key here is situational awareness. One of the moreterrifying educational instances was when an employee had a weapon malfunction on the range. I instructed everyone on the firing line to "Cease Fire", which they did, and everyone except for the individual involved cleared and holstered their weapons. The individual I was dealing with conducted malfunctions drills on his weapon 3 times under my supervision, and was unable to clear the weapon. I then instructed him to "keep the weapon pointed downrange, and hand it to me slowly." Next thing I know, he turns toward me, says, "Here ya go," and I look down at the barrel Smith and Wesson .40 semi-automatic pistol swinging toward my midsection. Situational awareness, folks. Learn from my mistakes!
Rule #3: Get your finger off the trigger!
This one, like all the others, would seem to be a no-brainer, but still, the first thing people always seem to do when I let them handle one of my firearms (those who haven't handled them before, anyway) is put their finger on the trigger. I prefer to keep it simple, to the point, and always observe how folks handle the firearm BEFORE it's loaded, but after my brief safety lecture. I've had tons of fun going to the range, and allowing folks who have had no exposure to firearms the chance to gain a stronger understanding, but it's always been my priority to emphasize safety. Most firearms will only discharge if the trigger is squeezed. I'm not saying that malfunctions are impossible, which is why we have rules #2 and #4, but a trigger finger on the trigger when the other rules aren't being followed can be a recipe for disaster.
Rule #4: CEASE FIRE!!
This rule is one of the most often-overlooked, and one of the most important. You've made sure all weapons are treated as if they are loaded, muzzle awareness has been a priority, and fingers have remained safely indexed outside of the trigger guard. This may seem like a repeat of #2, but there is more to it than simple muzzle awareness. . . The key is to be aware of your target. Know what's behind it, what's in front, what you might hit if you miss, where the bullets will land. You can't just set up tin cans on the fence and plink away. Well, you could, but I'm not sure anyone has built a fence in front of a proper berm for the purpose of setting up cans. . . Safety is the key word, and it's not just the safety of those directly involved at the range, it's the safety of everyone within the distance that projectile will travel. Believe it or not, once that bullet leaves the barrel, it doesn't cease to be our responsibility. Another point to consider, range safety is not the responsibility of one person. Everyone present is considered a safety officer, in that anyone can call "Cease Fire" if they observe any unsafe conditions or behavior.
Following these rules should come naturally to those who have the proper mindset when handling firearms. Some of us have been given a more rigorous introduction to these principles than others (Military & Law Enforcement firearms training tends to have that effect), but the intention of the above rules is to maintain a safe environment, and I believe everyone can benefit from familiarizing themselves before ever coming into contact with a firearm, loaded or otherwise.
As always, if you have anything to add, feel free to comment below!
I will also preface this by saying that the purpose of this post is mostly as a reminder to those of you who have some experience. Newcomers to the hobby can still learn something, but the stories relayed below will be based mostly on my experiences with the inexperienced shooters I've had to "gently" remind of the rules while at the range, in firearms training classes, and the like.
Rule #1: It's a Lethal Weapon, you idiot!
Until you've had these rules explained to you, if you've never handled a firearm before, it's unlikely that the "4 rules" are at the front of your mind. The first time I handled a firearm, I think the only thought I can remember was, "This is so cool! I wonder when we're going to get to shoot these things!" The last thing on my mind was the power of the weapon, and I was SO sure that it was unloaded, I really didn't care where I pointed the muzzle. Well, for a minute, anyway. If there's anything my time in the military has taught me, it's to always treat the weapon as if it's loaded, even when I'm sure it's not. There are too many stories about people who have had negligent discharges while handling firearms, we don't need any more.
Rule #2: Don't point that thing at me!
It doesn't matter how many times you tell someone this rule, they will always forget. We need to be attentive at all times, especially with those who have little or no experience. I have done firearms qualifications for employees of the company I'm employed by, and it seems that no matter how many times I've said it, someone always has a loaded gun pointed at them when we get to the firing line. Usually, it's me. That's why I wear a vest, and carry a hefty life insurance policy. The key here is situational awareness. One of the more
Rule #3: Get your finger off the trigger!
This one, like all the others, would seem to be a no-brainer, but still, the first thing people always seem to do when I let them handle one of my firearms (those who haven't handled them before, anyway) is put their finger on the trigger. I prefer to keep it simple, to the point, and always observe how folks handle the firearm BEFORE it's loaded, but after my brief safety lecture. I've had tons of fun going to the range, and allowing folks who have had no exposure to firearms the chance to gain a stronger understanding, but it's always been my priority to emphasize safety. Most firearms will only discharge if the trigger is squeezed. I'm not saying that malfunctions are impossible, which is why we have rules #2 and #4, but a trigger finger on the trigger when the other rules aren't being followed can be a recipe for disaster.
Rule #4: CEASE FIRE!!
This rule is one of the most often-overlooked, and one of the most important. You've made sure all weapons are treated as if they are loaded, muzzle awareness has been a priority, and fingers have remained safely indexed outside of the trigger guard. This may seem like a repeat of #2, but there is more to it than simple muzzle awareness. . . The key is to be aware of your target. Know what's behind it, what's in front, what you might hit if you miss, where the bullets will land. You can't just set up tin cans on the fence and plink away. Well, you could, but I'm not sure anyone has built a fence in front of a proper berm for the purpose of setting up cans. . . Safety is the key word, and it's not just the safety of those directly involved at the range, it's the safety of everyone within the distance that projectile will travel. Believe it or not, once that bullet leaves the barrel, it doesn't cease to be our responsibility. Another point to consider, range safety is not the responsibility of one person. Everyone present is considered a safety officer, in that anyone can call "Cease Fire" if they observe any unsafe conditions or behavior.
Following these rules should come naturally to those who have the proper mindset when handling firearms. Some of us have been given a more rigorous introduction to these principles than others (Military & Law Enforcement firearms training tends to have that effect), but the intention of the above rules is to maintain a safe environment, and I believe everyone can benefit from familiarizing themselves before ever coming into contact with a firearm, loaded or otherwise.
As always, if you have anything to add, feel free to comment below!
Wednesday, November 20, 2013
Review: .300 AAC "Blackout"
This topic is one that has come up a number of times with friends and family, particularly when discussing the AR-15 platform. The .300 AAC Blackout cartridge (known simply as ".300BLK" on the forums) is a relatively new arrival, and has steadily been gaining a following in the enthusiast world.
First off, I'll share the basics of the cartridge. This is essentially a trimmed-down .223/5.56 case, necked down to accept a .30 caliber projectile. The overall length of the cartridge is only slightly shorter (.4mm shorter, to be precise) than that of a 5.56 round, although the projectile is significantly larger. The beauty of this design is it's simplicity; a .300BLK rifle requires only a barrel replacement, every other component is identical to those in the more common 5.56mm and .223 caliber iterations of the AR15.
I would like to point out a problem I see with this, and let this serve as a warning. A .300BLK round is shorter in overall length, and can possibly chamber fully in a 5.56mm/.223 caliber rifle. This means that it's possible to mistakenly put a .300BLK round into a magazine with .223 ammo, chamber the round, and fire the weapon, which would likely result in significant damage to the weapon, and possible injury to the shooter. This is why, when I go to the range, I make sure the ammunition for the .300BLK is kept separately from any other caliber, and I pay close attention when loading magazines. I am not speaking from experience here, I haven't blown up my rifle by mistakenly loading the wrong cartridge, but this is an issue I have heard about happening at least once before.
Now that that's out of the way, let's talk a little bit about the ballistic properties of the round. This cartridge is available in a number of different bullet weights, most common being 115gr. and 125gr. A standard 5.56 NATO cartridge has a bullet weight of only 62gr. Since the Blackout was designed as a .30 caliber solution for the AR15/M16/M4 platform, the ballistics are most frequently compared to those of the original AR15 caliber, the 5.56mm NATO.
For comparison's sake, let's briefly review the ballistic properties of a common AR15 variant:
Caliber: 5.56mm NATO (62gr. FMJ-BT)
Barrel Length: 16 Inches
Effective Range: 500 m (Point Target)
Bullet Velocity: 2,927 ft/sec.
Energy: 1,303 lb/ft.
And the same rifle, chambered in .300 AAC Blackout:
Caliber: .300BLK (125gr. UMC)
Barrel Length: 16 Inches
Effective Range: 460 m (Point Target)
Bullet Velocity: 2,215 ft/sec.
Energy: 1,360 lb/ft.
As you can see, the velocity is lower, as expected, for the .300BLK. Energy is higher, but in terms of bullet drift and drop, the Blackout experiences both at a shorter distance than that of the 5.56. The 5.56, being a much smaller/lighter projectile, doesn't carry as much energy moving past it's effective range, however. The .300BLK above carries the same amount of energy at 700 m, that the 5.56 cartridge does at 500 m. The projectile size and energy increase of the .300BLK also allow for greater penetration of "hard targets" than the 5.56.
Another benefit of the .300BLK is that the original project goals specified that it be suitable for use in a short-barreled carbine outfitted with a Suppressor. A 220gr. subsonic .300BLK is a fantastic round for suppressor use, especially when coupled with a short barrel. With a quality suppressor mounted to a 9" Barrel, you can expect a reduction to approximately 130-135 dB, which is below the 140 dB "Safe Threshold" for unprotected hearing. Supersonic loads, however, are significantly louder, even when using a suppressor, and may result in hearing loss if proper hearing protection is not used.
I will elaborate more on this cartridge, including photographs, within the next several days. I have only one AR15 in my collection now, which is chambered in .300 BLK. I made the switch just over a year ago, and I haven't looked back.
Stay tuned for more updates!
First off, I'll share the basics of the cartridge. This is essentially a trimmed-down .223/5.56 case, necked down to accept a .30 caliber projectile. The overall length of the cartridge is only slightly shorter (.4mm shorter, to be precise) than that of a 5.56 round, although the projectile is significantly larger. The beauty of this design is it's simplicity; a .300BLK rifle requires only a barrel replacement, every other component is identical to those in the more common 5.56mm and .223 caliber iterations of the AR15.
I would like to point out a problem I see with this, and let this serve as a warning. A .300BLK round is shorter in overall length, and can possibly chamber fully in a 5.56mm/.223 caliber rifle. This means that it's possible to mistakenly put a .300BLK round into a magazine with .223 ammo, chamber the round, and fire the weapon, which would likely result in significant damage to the weapon, and possible injury to the shooter. This is why, when I go to the range, I make sure the ammunition for the .300BLK is kept separately from any other caliber, and I pay close attention when loading magazines. I am not speaking from experience here, I haven't blown up my rifle by mistakenly loading the wrong cartridge, but this is an issue I have heard about happening at least once before.
Now that that's out of the way, let's talk a little bit about the ballistic properties of the round. This cartridge is available in a number of different bullet weights, most common being 115gr. and 125gr. A standard 5.56 NATO cartridge has a bullet weight of only 62gr. Since the Blackout was designed as a .30 caliber solution for the AR15/M16/M4 platform, the ballistics are most frequently compared to those of the original AR15 caliber, the 5.56mm NATO.
For comparison's sake, let's briefly review the ballistic properties of a common AR15 variant:
Caliber: 5.56mm NATO (62gr. FMJ-BT)
Barrel Length: 16 Inches
Effective Range: 500 m (Point Target)
Bullet Velocity: 2,927 ft/sec.
Energy: 1,303 lb/ft.
And the same rifle, chambered in .300 AAC Blackout:
Caliber: .300BLK (125gr. UMC)
Barrel Length: 16 Inches
Effective Range: 460 m (Point Target)
Bullet Velocity: 2,215 ft/sec.
Energy: 1,360 lb/ft.
As you can see, the velocity is lower, as expected, for the .300BLK. Energy is higher, but in terms of bullet drift and drop, the Blackout experiences both at a shorter distance than that of the 5.56. The 5.56, being a much smaller/lighter projectile, doesn't carry as much energy moving past it's effective range, however. The .300BLK above carries the same amount of energy at 700 m, that the 5.56 cartridge does at 500 m. The projectile size and energy increase of the .300BLK also allow for greater penetration of "hard targets" than the 5.56.
Another benefit of the .300BLK is that the original project goals specified that it be suitable for use in a short-barreled carbine outfitted with a Suppressor. A 220gr. subsonic .300BLK is a fantastic round for suppressor use, especially when coupled with a short barrel. With a quality suppressor mounted to a 9" Barrel, you can expect a reduction to approximately 130-135 dB, which is below the 140 dB "Safe Threshold" for unprotected hearing. Supersonic loads, however, are significantly louder, even when using a suppressor, and may result in hearing loss if proper hearing protection is not used.
I will elaborate more on this cartridge, including photographs, within the next several days. I have only one AR15 in my collection now, which is chambered in .300 BLK. I made the switch just over a year ago, and I haven't looked back.
Stay tuned for more updates!
Review: Heckler & Koch USP45 Tactical
Recently, I decided to act on impulse, and picked up a pistol I have always been intrigued by. This is the Heckler & Koch (HK) USP45 Tactical. I spent some time at the range with the USP a while back, but we'll get to that later.
First of all, this is a BIG pistol. It's a full-size .45ACP semi-automatic with a 4.78" Threaded Barrel. The magazine capacity depends on which model you purchase, but most will include 12-round magazines. The USP weighs in at 1.9 lbs without a magazine, and the overall length of the pistol is 8.64". Included with most is a cleaning kit, soft-sided case, two 12-round magazines, and of course, the pistol itself.
Build quality is fantastic, everything fits as you'd expect for a pistol in this price range. The trigger pull is smooth, with a clean break and short reset. I did notice a "catch" in the decocking lever, but nothing more than you'd find in a comparable pistol from another reputable manufacturer. The ergonomics are alright, the grip angle is similar to a 1911, although this feels markedly different, by virtue of the size difference and single-stack vs. double-stack design. The grip design is similar to a 2nd-generation Glock or Springfield XD. The slide retracts easily, with no noticeable roughness.
It's got a threaded barrel, but uses a less-common "reverse", or left-hand thread design, which is rather uncommon. If suppressor use is the primary concern for going with the H&K, keep in mind, you may need to purchase a suppressor specifically for this weapon. The raised sights are designed for use with a suppressor, which is an often-overlooked addition by many suppressor users.
If you are planning on using a weapon-mounted light, however, one thing to consider is the rail design employed on the USP. H&K uses a proprietary rail design, and is NOT compatible with most off-the-shelf weapon lights for this reason. If you want to use a weapon light on this pistol, you only have two options: Buy the Insight USPC light made specifically for the USP, or purchase an adapter, and use a standard weapon light (Surefire X300, Streamlight TLR-1/2, etc.). The USPC light is about $190 new, whereas a Streamlight TLR-1 can be found for around $100. If you go with the rail adapter, holster selection just became a whole lot more difficult, and you may need to go with a custom holster.
When I took the H&K to the local indoor shooting range, I brought along a box of Winchester FMJ ammunition, which has recently become my go-to choice for range ammunition. I also brought a box of 50 rounds of Winchester Ranger .45ACP Jacketed Hollow Point ammunition, since my intent was to carry this particular ammo, and wanted to at least put some rounds downrange to familiarize myself with the way the pistol handled it. I was not disappointed.
With the target about 15 yards from my shooting position, I was easily able to place all 12 rounds right where I wanted them. My grouping was similar to that of my duty weapon, a Glock 22 .40S&W pistol, which I've put hundreds of rounds through. All 12 rounds hit within 8-10" of the center of the target. The targets I use for these range trips are usually standard law-enforcement silhouette targets, and every round fired at this distance would have resulted in significant damage to an attacker, given all other factors were equal (which we all know, in a self-defense situation, is rarely the case. . . )
I replaced the target with a fresh one, and put it at 25 yards from the bench. In a standing, unsupported position, using my normal two-handed grip, I was able to place all 12 rounds of the 2nd magazine on the target. This pistol fired accurately, the sights were right where they needed to be, and handling the pistol was just as easy for me as handling my primary carry pistol. Every round went where I intended it to, and the smooth trigger pull lended itself quite well to preventing anticipation. Overall, the USP was a fantastic shooter, accuracy was more than adequate for the distance I was shooting, and reliability was not a concern. I put 150 rounds of ammo through the USP that day, and did not experience any malfunctions.
Overall, I'd say the H&K USP .45 Tactical is a fantastic pistol, it is accurate, easy to handle, and is very reliable. I'll detail the positive and negative aspects of the pistol below. Remember, these are simply my observations, I'm not endorsing or condemning this pistol in any way.
Pros: Accurate, simple operation, reliable, and low-maintenance. Not to mention, aesthetically, it's a fine looking pistol.
Cons: Heavy, bulky, difficult to conceal, holster selection is limited, proprietary rail, proprietary barrel threading.
The Final Word: As a target pistol, this pistol does a fine job. If you are looking for a concealed-carry pistol, you might want to keep looking. Even given the proprietary barrel threading, light rail, and difficulty in finding holsters, this is a fantastic firearm, and is arguably one of the best combat pistols ever made. From a practical standpoint, I personally wouldn't use this pistol for anything other than target shooting, or open carry. From a firearms enthusiast standpoint, I appreciate the weapon for it's simple design, reliability, accuracy, and aesthetics. In the end, you are the only one who can decide whether or not to purchase this particular model. You won't miss much if you don't, but you won't regret it if you do. Either way, this is a fantastic shooter, and I really enjoy it.
First of all, this is a BIG pistol. It's a full-size .45ACP semi-automatic with a 4.78" Threaded Barrel. The magazine capacity depends on which model you purchase, but most will include 12-round magazines. The USP weighs in at 1.9 lbs without a magazine, and the overall length of the pistol is 8.64". Included with most is a cleaning kit, soft-sided case, two 12-round magazines, and of course, the pistol itself.
Build quality is fantastic, everything fits as you'd expect for a pistol in this price range. The trigger pull is smooth, with a clean break and short reset. I did notice a "catch" in the decocking lever, but nothing more than you'd find in a comparable pistol from another reputable manufacturer. The ergonomics are alright, the grip angle is similar to a 1911, although this feels markedly different, by virtue of the size difference and single-stack vs. double-stack design. The grip design is similar to a 2nd-generation Glock or Springfield XD. The slide retracts easily, with no noticeable roughness.
It's got a threaded barrel, but uses a less-common "reverse", or left-hand thread design, which is rather uncommon. If suppressor use is the primary concern for going with the H&K, keep in mind, you may need to purchase a suppressor specifically for this weapon. The raised sights are designed for use with a suppressor, which is an often-overlooked addition by many suppressor users.
If you are planning on using a weapon-mounted light, however, one thing to consider is the rail design employed on the USP. H&K uses a proprietary rail design, and is NOT compatible with most off-the-shelf weapon lights for this reason. If you want to use a weapon light on this pistol, you only have two options: Buy the Insight USPC light made specifically for the USP, or purchase an adapter, and use a standard weapon light (Surefire X300, Streamlight TLR-1/2, etc.). The USPC light is about $190 new, whereas a Streamlight TLR-1 can be found for around $100. If you go with the rail adapter, holster selection just became a whole lot more difficult, and you may need to go with a custom holster.
When I took the H&K to the local indoor shooting range, I brought along a box of Winchester FMJ ammunition, which has recently become my go-to choice for range ammunition. I also brought a box of 50 rounds of Winchester Ranger .45ACP Jacketed Hollow Point ammunition, since my intent was to carry this particular ammo, and wanted to at least put some rounds downrange to familiarize myself with the way the pistol handled it. I was not disappointed.
With the target about 15 yards from my shooting position, I was easily able to place all 12 rounds right where I wanted them. My grouping was similar to that of my duty weapon, a Glock 22 .40S&W pistol, which I've put hundreds of rounds through. All 12 rounds hit within 8-10" of the center of the target. The targets I use for these range trips are usually standard law-enforcement silhouette targets, and every round fired at this distance would have resulted in significant damage to an attacker, given all other factors were equal (which we all know, in a self-defense situation, is rarely the case. . . )
I replaced the target with a fresh one, and put it at 25 yards from the bench. In a standing, unsupported position, using my normal two-handed grip, I was able to place all 12 rounds of the 2nd magazine on the target. This pistol fired accurately, the sights were right where they needed to be, and handling the pistol was just as easy for me as handling my primary carry pistol. Every round went where I intended it to, and the smooth trigger pull lended itself quite well to preventing anticipation. Overall, the USP was a fantastic shooter, accuracy was more than adequate for the distance I was shooting, and reliability was not a concern. I put 150 rounds of ammo through the USP that day, and did not experience any malfunctions.
Overall, I'd say the H&K USP .45 Tactical is a fantastic pistol, it is accurate, easy to handle, and is very reliable. I'll detail the positive and negative aspects of the pistol below. Remember, these are simply my observations, I'm not endorsing or condemning this pistol in any way.
Pros: Accurate, simple operation, reliable, and low-maintenance. Not to mention, aesthetically, it's a fine looking pistol.
Cons: Heavy, bulky, difficult to conceal, holster selection is limited, proprietary rail, proprietary barrel threading.
The Final Word: As a target pistol, this pistol does a fine job. If you are looking for a concealed-carry pistol, you might want to keep looking. Even given the proprietary barrel threading, light rail, and difficulty in finding holsters, this is a fantastic firearm, and is arguably one of the best combat pistols ever made. From a practical standpoint, I personally wouldn't use this pistol for anything other than target shooting, or open carry. From a firearms enthusiast standpoint, I appreciate the weapon for it's simple design, reliability, accuracy, and aesthetics. In the end, you are the only one who can decide whether or not to purchase this particular model. You won't miss much if you don't, but you won't regret it if you do. Either way, this is a fantastic shooter, and I really enjoy it.
Wednesday, January 16, 2013
Gun Control: Will It Solve Anything?
In response to the senseless shooting deaths of 27 people at the hands of a psychopath last month, President Obama signed 23 Executive Orders on Wednesday, January 16th, 2013. The President also urged Congress to pass into law an Assault Weapons Ban, universal background checks, and magazine capacity limits. What our politicians are able to come up with is not quite clear yet.
The proposals I've heard about so far have run the gamut from reinstating the 1994 Clinton Assault Weapons Ban to an all-out confiscation/forfeiture of any weapon with a single "military-like" characteristic. We've all heard the same arguments from both sides. "Think of the children!" and "We need more guns in schools!" immediately come to mind. What I don't agree with is the fact that politicians, our representatives in government, are using this tragedy as a soapbox upon which to preach their agenda. The knee-jerk reactions from the Left are forcing the Right to respond, which turns a tragedy into a political circus, which I personally find despicable.
Regardless of my personal feelings on the matter, the fact is simple. There is a lot of talk of taking immediate action, and several things have already been done in response to this event. I'm not here to try to scare you, or inform you of what's going on, because I believe it is your job to look at the information and come to your own conclusions. It's not my place to convince you to agree or disagree with my opinion. I will, however, strongly urge you to make your opinion known to your representatives. If you think there should be no further gun control measures taken, write them a letter, make a quick phone call, send an email. If you believe that the solution to the problem at hand is to eliminate assault weapons, restrict magazine capacities, and require stricter background checks for every firearm purchase, let your representatives know.
On the other side of the coin, not only should you let your representatives know YOUR opinions on the matter, but you should make an effort to learn THEIR stance as well. It is increasingly important for everyone to do their part here. Make your voices heard, and make sure your representatives are representing your interests, not their own.
Please take a moment to let us know where you stand, vote in the poll on the left side of the page. We would love to hear your opinions below in the Comments section as well, or you can join the discussion on our Facebook page.
The proposals I've heard about so far have run the gamut from reinstating the 1994 Clinton Assault Weapons Ban to an all-out confiscation/forfeiture of any weapon with a single "military-like" characteristic. We've all heard the same arguments from both sides. "Think of the children!" and "We need more guns in schools!" immediately come to mind. What I don't agree with is the fact that politicians, our representatives in government, are using this tragedy as a soapbox upon which to preach their agenda. The knee-jerk reactions from the Left are forcing the Right to respond, which turns a tragedy into a political circus, which I personally find despicable.
Regardless of my personal feelings on the matter, the fact is simple. There is a lot of talk of taking immediate action, and several things have already been done in response to this event. I'm not here to try to scare you, or inform you of what's going on, because I believe it is your job to look at the information and come to your own conclusions. It's not my place to convince you to agree or disagree with my opinion. I will, however, strongly urge you to make your opinion known to your representatives. If you think there should be no further gun control measures taken, write them a letter, make a quick phone call, send an email. If you believe that the solution to the problem at hand is to eliminate assault weapons, restrict magazine capacities, and require stricter background checks for every firearm purchase, let your representatives know.
On the other side of the coin, not only should you let your representatives know YOUR opinions on the matter, but you should make an effort to learn THEIR stance as well. It is increasingly important for everyone to do their part here. Make your voices heard, and make sure your representatives are representing your interests, not their own.
Please take a moment to let us know where you stand, vote in the poll on the left side of the page. We would love to hear your opinions below in the Comments section as well, or you can join the discussion on our Facebook page.
Friday, March 9, 2012
Something Brewing at Smith and Wesson?
I wanted to share this new video, uploaded by Smith & Wesson (via YouTube) on Wednesday. . . The video is VERY vague, it doesn't tell you what is coming, but one thing's for certain, S&W is up to something. Could this be a single-stack M&P (hopefully with a better factory trigger!) to remain competitive with Springfield's new XDS? Maybe some sort of S&W-branded non-lethal self-defense option, like OC spray? Stun Gun with interchangeable backstraps? We don't know, but it definitely something we want to know more about! If you have any ideas as to what could be going on at Smith & Wesson, leave a comment! We'd love to hear your opinion!
Here's the video:
As always, we are available here by commenting below, on Facebook, or via email by clicking here.
Here's the video:
As always, we are available here by commenting below, on Facebook, or via email by clicking here.
Wednesday, March 7, 2012
How to Obtain a Concealed Pistol License
This guide is specific to the State of Michigan, since I'm not familiar enough with the process in other states to comment. It is rather disorganized now, but when I have some free time, I will clean it up a bit.
First of all, you need to determine of you are eligible. Follow THIS LINK to see the requirements on the state's website (link opens new window).
Once you are sure you are eligible to apply, it is time to take the "CPL Class", which can be one of two different classes:
Upon successful completion of the class, you will receive a "Certificate of Completion", which will need to be submitted along with the CPL Application Packet (the packet is often provided by the instructor of the CPL course, but if it is not, you can request one at your local County Clerk's Office). Complete the packet, which consists of personal information and a questionnaire, and submit the CPL Packet, Certificate of Completion of the CPL course, a photograph (similar to a Passport photo, but not quite. If you have this done somewhere that takes passport photos, tell them you need a CPL/CCW photo, and they will know what to do) and the $105 Application Fee to the County Clerk's Office. After this is submitted, you aren't quite finished yet. . .
You must then take the Payment Receipt from the County Clerk's office to the Sheriff's Department (in my case, the County Clerk directed me to the City Police, so your results may vary), where you will be fingerprinted. After this, they may give you a slip to return to the County Clerk, but they usually don't.
Then begins the waiting game. You've shelled out the cash for the class, ammunition, and application fee, and possibly even paid for your fingerprints to be taken. Since this process is handled by the County, and not by the State, you may experience a longer or shorter wait time than others. Your application packet will be submitted to the "Gun Board," who will look at it, and decide "Yes" or "No" on granting the CPL. Keep in mind, as long as you meet all of the requirements set forth by the State of Michigan in the link above, they are LEGALLY REQUIRED to grant your CPL. They MAY require you to make an appearance before the Gun Board. This could be because they have a question about one or more of the answers on the CPL application packet, or this could be because it is practice in that county to require all applicants to take time out of their busy schedules to go tell a group of County employees a bunch of information that is in black and white on the papers you already gave them. Either way, as I stated, if you meet the State's requirements, the County is REQUIRED to grant your CPL application. Expect this process to take a while, the average wait time seems to be right around 4-6 weeks.
After your packet is approved, you will either receive a phone call or a letter from the County Clerk's office informing you that your CPL is available for pickup. When you arrive to pick up your CPL, they will ask you to sign it, and most counties will laminate the card for you. Once that is done, and the card is in your possession, you are legally permitted to carry a concealed pistol!
Stay tuned for more information, we will be putting together an article about the "Do's and Don't's" of Concealed Carry!
First of all, you need to determine of you are eligible. Follow THIS LINK to see the requirements on the state's website (link opens new window).
Once you are sure you are eligible to apply, it is time to take the "CPL Class", which can be one of two different classes:
- Michigan State Pistol Safety Course, which is taught by an MCOLES-Certified Peace Officer
- National Rifle Association's "Personal Protection In The Home", which fulfills the requirement also
Upon successful completion of the class, you will receive a "Certificate of Completion", which will need to be submitted along with the CPL Application Packet (the packet is often provided by the instructor of the CPL course, but if it is not, you can request one at your local County Clerk's Office). Complete the packet, which consists of personal information and a questionnaire, and submit the CPL Packet, Certificate of Completion of the CPL course, a photograph (similar to a Passport photo, but not quite. If you have this done somewhere that takes passport photos, tell them you need a CPL/CCW photo, and they will know what to do) and the $105 Application Fee to the County Clerk's Office. After this is submitted, you aren't quite finished yet. . .
You must then take the Payment Receipt from the County Clerk's office to the Sheriff's Department (in my case, the County Clerk directed me to the City Police, so your results may vary), where you will be fingerprinted. After this, they may give you a slip to return to the County Clerk, but they usually don't.
Then begins the waiting game. You've shelled out the cash for the class, ammunition, and application fee, and possibly even paid for your fingerprints to be taken. Since this process is handled by the County, and not by the State, you may experience a longer or shorter wait time than others. Your application packet will be submitted to the "Gun Board," who will look at it, and decide "Yes" or "No" on granting the CPL. Keep in mind, as long as you meet all of the requirements set forth by the State of Michigan in the link above, they are LEGALLY REQUIRED to grant your CPL. They MAY require you to make an appearance before the Gun Board. This could be because they have a question about one or more of the answers on the CPL application packet, or this could be because it is practice in that county to require all applicants to take time out of their busy schedules to go tell a group of County employees a bunch of information that is in black and white on the papers you already gave them. Either way, as I stated, if you meet the State's requirements, the County is REQUIRED to grant your CPL application. Expect this process to take a while, the average wait time seems to be right around 4-6 weeks.
After your packet is approved, you will either receive a phone call or a letter from the County Clerk's office informing you that your CPL is available for pickup. When you arrive to pick up your CPL, they will ask you to sign it, and most counties will laminate the card for you. Once that is done, and the card is in your possession, you are legally permitted to carry a concealed pistol!
Stay tuned for more information, we will be putting together an article about the "Do's and Don't's" of Concealed Carry!
Tuesday, March 6, 2012
I'm an Addict. . .
Today, we are going to loosen our ties, take off the tin foil hats, and discuss a more light-hearted topic: Firearm Addiction.
I'm an addict. Just about everyone reading this is an addict. According to the Merriam-Webster Dictionary, addiction is "to devote or surrender (oneself) to something habitually or obsessively." I tend to agree that I have surrendered myself to firearms habitually. . . I bring new ones home on a regular basis, I spend money on guns and ammunition that probably would be better served elsewhere, and there's just something about them that gives me that "warm and fuzzy" feeling. Yeah, I'm an addict.
For some reason, I impulsively stop at the gun shop on the way home from work just about every Friday, and I compulsively spend more money on guns I don't need. By my estimates, I've spent around $5,000 at my local gun shop in the past 18 months. I'm currently in the process of paying off a pair of brand new Glock pistols, and I have a list of what's next. . . I see no end in sight. I can try to avoid it, but there's always going to be that "slip" that dumps me right back into the vicious cycle.
But hey, I'm stimulating my local economy, right? Yeah, that's true, I'm doing my part to help the locals out of this economic "slump." Or at least that's how I manage to convince myself that "just one more" is okay.
So, I want to hear from you! You've looked through the articles, you've seen the pictures of my collection, and you know I'm in too deep to just "give it up". If you're on Facebook, you've seen more photos of my "hobby" (if you can even call it that). I want to hear what you think, I want to know if you're as addicted as I am, and if you know of any cure. I'm tired of being broke!
Post your comments in the box below, join us on Facebook, or send us an email at thelowready@gmail.com .
As always, thanks for checking in, and stay tuned, there are several more exciting articles in the works, including a sneak peek at a brand new segment about the new AR15 cartridge that's getting all the raves, .300AAC Blackout!
I'm an addict. Just about everyone reading this is an addict. According to the Merriam-Webster Dictionary, addiction is "to devote or surrender (oneself) to something habitually or obsessively." I tend to agree that I have surrendered myself to firearms habitually. . . I bring new ones home on a regular basis, I spend money on guns and ammunition that probably would be better served elsewhere, and there's just something about them that gives me that "warm and fuzzy" feeling. Yeah, I'm an addict.
For some reason, I impulsively stop at the gun shop on the way home from work just about every Friday, and I compulsively spend more money on guns I don't need. By my estimates, I've spent around $5,000 at my local gun shop in the past 18 months. I'm currently in the process of paying off a pair of brand new Glock pistols, and I have a list of what's next. . . I see no end in sight. I can try to avoid it, but there's always going to be that "slip" that dumps me right back into the vicious cycle.
But hey, I'm stimulating my local economy, right? Yeah, that's true, I'm doing my part to help the locals out of this economic "slump." Or at least that's how I manage to convince myself that "just one more" is okay.
So, I want to hear from you! You've looked through the articles, you've seen the pictures of my collection, and you know I'm in too deep to just "give it up". If you're on Facebook, you've seen more photos of my "hobby" (if you can even call it that). I want to hear what you think, I want to know if you're as addicted as I am, and if you know of any cure. I'm tired of being broke!
Post your comments in the box below, join us on Facebook, or send us an email at thelowready@gmail.com .
As always, thanks for checking in, and stay tuned, there are several more exciting articles in the works, including a sneak peek at a brand new segment about the new AR15 cartridge that's getting all the raves, .300AAC Blackout!
Monday, March 5, 2012
The Basics of Concealed Carry
I am not a lawyer. I don't claim to be an expert in legal matters, and I never will. Fact is, the laws change so often, and most of the time are so vague, that even if you do know the laws down to the letter, a judge could interpret them differently then you do, and everything you thought you knew could be turned on its head.
That said, this article isn't about the LEGALITY of concealed carry - it's up to YOU to comply with the law. This article is about the mechanics of it, describing the different methods of concealing a pistol on your person, and showing you some of the different options you have. Our focus is going to be mostly on holster types.
There are many different kinds of holsters out there. So many, in fact, that we will only scratch the surface of what's available on the market today. Just to provide an idea of what's available, here are a few types that I've seen:
The "vertical" type is the same, the difference being that the pistol is positioned with the barrel pointing downward, rather than to the rear. I find the draw to be a little more uncomfortable in a vertical holster, as you have to pull the pistol straight up. Most vertical holsters require the use of belt attachments as well, so you can actually remove the pistol without using both hands.
As far as ease of draw, it's pretty simple, although you do have to reach a little further to access your weapon than a traditional IWB, OWB, or pocket holster, and because you are reaching behind you, it seems a little more awkward than a shoulder rig. There are a number of different SOB rigs available, including the standard horizontal (actually slightly angled), which holds the pistol with the butt pointing up. They are also available in a vertical style, but unless you are wearing a long jacket (peacoat or trenchcoat), that style isn't going to conceal well at all.
That said, this article isn't about the LEGALITY of concealed carry - it's up to YOU to comply with the law. This article is about the mechanics of it, describing the different methods of concealing a pistol on your person, and showing you some of the different options you have. Our focus is going to be mostly on holster types.
There are many different kinds of holsters out there. So many, in fact, that we will only scratch the surface of what's available on the market today. Just to provide an idea of what's available, here are a few types that I've seen:
- Outside the Waistband (OWB)
- Inside the Waistband (IWB)
- Shoulder Holsters
- Ankle Holsters
- Pocket Holsters
- Small of Back (SOB) Holsters
- Thigh Holsters
These are just a few, and they are the types I will be focusing on. The list is not in any particular order, and I will try to explain the pros/cons of each type, as well as my personal preferences among those I've used.
Outside the Waistband (OWB)
I have at least one OWB holster for every pistol I carry. This is by far the most common holster type you'll see, as there are several different types for different kinds of carry. There are Duty Holsters, the type that you see police officers using, which usually offer different retention options, which we will talk about below. I carry my 1911 in a "Speed Scabbard" type holster, which holds the pistol very close to the body, and offers a thumb break for retention. I also have a few Duty Holsters, as I work part-time in armed security, but that is another topic for another day.
- Pros:
- Easy access to pistol
- Available with a number of retention options
- Commonly available
- Comfortable
- Usually inexpensive when compared to other types
- Doesn't require larger pants
- Cons:
- Tends to "print" more than others
- Belt-slide types require partial removal of belt to take off
Inside the Waistband (IWB)
I have used a few different IWB holsters, mostly with my Springfield Armory XD45, which is my everyday carry pistol. The one that I have used the longest is a DeSantis Intruder, which uses both Leather and Kydex in it's construction. It is a bulkier holster than the OWB holsters I use, but it makes my .45 virtually disappear, as long as I'm wearing a shirt that is loose-fitting. The XD45 is a thick pistol, which makes it hard to conceal normally, but the IWB holster is a great fit for it. There are many different options available, from a number of different manufacturers. This is a great way to carry, regardless of the type of pistol you carry.
- Pros:
- Conceals quite effectively
- Comfortable
- Commonly available in gun shops, but better deals and more options available online
- Easy to take off, usually slides into waistband and "hooks" to belt.
- Cons
- Tend to be more pricey (My DeSantis Intruder was upwards of $60)
- Not all are comfortable, the "universal" types tend to require frequent "adjusting"
- Require pants to be a size or two larger than normal to accommodate
Shoulder Holsters
There are a couple different types, the first we will speak of is the "horizontal" type. This is what I carry my Beretta 92FS in, a Triple K leather shoulder rig. This type doesn't use the standard "belt loop" attachment like many others do, which I find more comfortable, as it doesn't pull your belt up when you sit down. I do enjoy carrying the Beretta in this manner, but this requires a little more planning to make it work. First, it is going to require either a heavier shirt over top of the holster, or a jacket of some kind. If I'm going to be outside most of the day, and it's cool enough to wear a medium to heavy jacket, I'll wear the shoulder rig. This allows easier access than pulling a jacket overtop of the pistol's grip in an IWB or OWB holster, as you simply reach into the jacket, hit the thumb break, and pull the pistol out. The drawback is if it's really cold, as access is only easier if you are able to leave the jacket unzipped/unbuttoned. It's a pretty comfortable carry method, but you aren't going to forget it's there, especially if you are going to be moving around a lot, since the pistol is going to be bouncing against your ribs the whole time.
The "vertical" type is the same, the difference being that the pistol is positioned with the barrel pointing downward, rather than to the rear. I find the draw to be a little more uncomfortable in a vertical holster, as you have to pull the pistol straight up. Most vertical holsters require the use of belt attachments as well, so you can actually remove the pistol without using both hands.
- Pros:
- Usually comfortable, but buying a quality holster is imperative. Cheap holsters tend to be ill-fitting, and can cause neck and shoulder pain.
- Great for concealing when wearing a jacket.
- Many options available
- Cons:
- Quality holsters can be VERY expensive, with many fetching upwards of $150.
- Require a heavy shirt or jacket over top, which can be uncomfortable on warmer days.
- Horizontal holsters point pistol barrel to the rear, which makes some uncomfortable.
- Vertical holsters make drawing pistol somewhat awkward
- Lots of "trial and error" required to find a good fit
- Belt loop attachment points cause belt/pants to "ride up" when you sit down
- Harder to conceal than IWB and some OWB holsters, sometimes "prints", although most people won't notice.
Ankle Holsters
There are a number of ankle holsters on the market these days. Ankle holsters are a great way to carry a Backup Gun (BUG), as they are virtually unnoticeable, usually comfortable, and even if/when they do "print", most people aren't looking at your ankles to see if you have a weapon anyway. They do have their drawbacks, however. First, if you wear tight-fitting pants, you won't be able to conceal an ankle rig. You need to wear either loose-fitting or "boot-cut" pants to effectively conceal. Second, while they do conceal quite well, depending on the weapon, they do require a significant amount of effort to draw, and it is nearly impossible to draw from an ankle holster while walking/running. The difficulty to draw is my reason for saying this is great for a BUG, but I wouldn't want to carry my primary weapon in this manner.
- Pros:
- Can be comfortable if you find one that works well for you
- Conceals quite well, and even if it does print, most people won't notice
- Cons:
- Requires a small gun-You won't hide a full-size 1911 in an ankle rig
- Significantly more difficult to draw from than the others mentioned above
- Can be pricey, although most are less expensive than IWB holsters.
- Require loose-fitting or "boot-cut" pants to conceal.
Pocket Holsters
These are great for "pocket guns", for obvious reasons. They place the weapon in easy reach, and you can have your hand on your weapon in a potential self-defense situation without anyone else noticing. Drawing from a pocket holster is as easy as retrieving your car keys or a cell phone. Pocket Pistols are usually smaller calibers, from .22LR to .380 (and even 9mm), although there are some .40S&W and .45ACP pistols that * technically* qualify as pocket guns. These smaller caliber, small-frame pistols are often striker-fired or concealed-hammer semi-automatics, and are great for use as BUG's or when deeper concealment is required. The main purpose of a pocket holster is to break up the shape of a pistol inside the pocket and cover the trigger to prevent loose objects from causing a negligent discharge. Carrying a pocket gun by itself in a pocket is dangerous, as something as simple as a loose thread can catch the trigger, and cause the weapon to discharge. Also, it's hard to conceal something that has the obvious shape of a gun in a pocket. Most pocket holsters work twofold, by preventing objects from accessing the trigger area, and by making the pistol look less like a pistol, and more like a wallet or other flat, rectangular object.
- Pros:
- Conceals very well, making the gun look like a wallet in the pocket
- Allows easy access
- Helps prevent negligent discharge by covering the trigger (in most designs, although there are some "open trigger" pocket holsters out there)
- Usually rather inexpensive (around $15-$30, depending on construction and manufacturer)
- Cons:
- Small pistols are usually small calibers with limited round capacity
- Limits use of a pocket, so if you're like me and carry keys & knife in one pocket and cell phone in the other, you'll have to find another place for something.
Small-of-Back (SOB) Holsters
I don't personally own any of these, although I have carried in this type of holster in the past. They can be comfortable, but they print pretty badly, and it is easier than you'd think for the weapon to become completely exposed without you noticing. Something as simple as bending at the waist to pick something up from the floor, or crouching to get something off a bottom shelf in the supermarket, can cause your shirt to rise above the weapon, get caught behind the grip, and your weapon is completely exposed. I didn't really care too much for this type of holster, simply because it required a lot more attention to the gun than I'd prefer.
As far as ease of draw, it's pretty simple, although you do have to reach a little further to access your weapon than a traditional IWB, OWB, or pocket holster, and because you are reaching behind you, it seems a little more awkward than a shoulder rig. There are a number of different SOB rigs available, including the standard horizontal (actually slightly angled), which holds the pistol with the butt pointing up. They are also available in a vertical style, but unless you are wearing a long jacket (peacoat or trenchcoat), that style isn't going to conceal well at all.
- Pros:
- I guess it's "different" and can be considered "cool" by some.
- Cons:
- Places pistol directly over the spinal cord, which can cause serious injury (even paralysis) in the event of a hard fall. Police officers don't even carry their handcuffs in that position anymore.
- Can become exposed without wearer's knowledge
- Rather expensive for quality holsters
- Weapon muzzle pointed to the side, which could cause issues when holstering weapon if a negligent discharge occurs.
- Again, muzzle awareness comes into play. In the event of a self-defense situation, the wearer will most likely pass across some part of their body, be it their kidney or leg, in an effort to get the sights on target as fast as possible. This could get ugly if there's a finger on the trigger. . .
- Nearly impossible to draw when seated in a vehicle
Thigh Holster/Drop Leg Holster
This is not particularly effective for concealing a weapon. At all. This type of holster often protrudes farther from the body than a OWB holster, and due to the location on your leg, you would have to be wearing a long coat to conceal at all, and even then, it will print like crazy. That said, if you prefer to openly carry your pistol (check local and state laws before attempting, and make sure you are well-versed in them), this is a great option for winter carry, as it is nearly impossible to conceal, and it eliminates any interference that may be caused by a jacket/coat. Thigh holsters generally place the weapon right at the wearer's fingertips, so drawing is easy, and this type of holster can be quite comfortable to wear, again depending on the quality of the holster. I used this type of holster extensively during my time in the Army, as it was the type of holster we were issued for our Beretta M9 pistols, which was used both when working as an MP on desk duty and in the field when on training exercises. The holster I used then was a Blackhawk with Level II retention, it was comfortable to wear for extended periods of time, although I will admit that I'm no longer a fan of Blackhawk holsters, for reasons I will share in a future article.
- Pros:
- Great for open carry-No chance of hiding!
- Comfortable (if you find one that works well for you)
- Available with different retention options
- Easy to draw and re-holster without inadvertently pointing the weapon at anyone/anything else
- Many styles and options available
- Cons:
- Virtually impossible to conceal
- Expensive (quality drop leg holsters can cost upwards of $120)
- Snags on doorframes, fences, just about everything it possibly can
- Can limit range of motion in leg
- A nightmare when it comes to weapon retention
- Moves around a lot when running, which makes drawing on the move significantly more difficult.
Well, there you have it! I will be adding some pictures to this article at some point in the next several days. We would love to hear your opinions on this topic! You can leave comments below in the Comments Box, over on our Facebook Page, or by email at thelowready@gmail.com
As usual, thanks for reading! Check back often for some exciting new articles that are in the works!
Saturday, March 3, 2012
First Look: Remington 870 Express 12-Gauge Shotgun
The Remington 870 is perhaps one of the most popular shotguns the past couple decades. It is a simple, yet effective, design. Remington offers the 870 in a variety of styles, which means there's an 870 for everyone. The model being reviewed here is the 870 "Express" model, with black synthetic furniture, and a single front "bead sight". It's simple, functional, and honestly, it's not something I'm terribly worried about scratching or damaging.


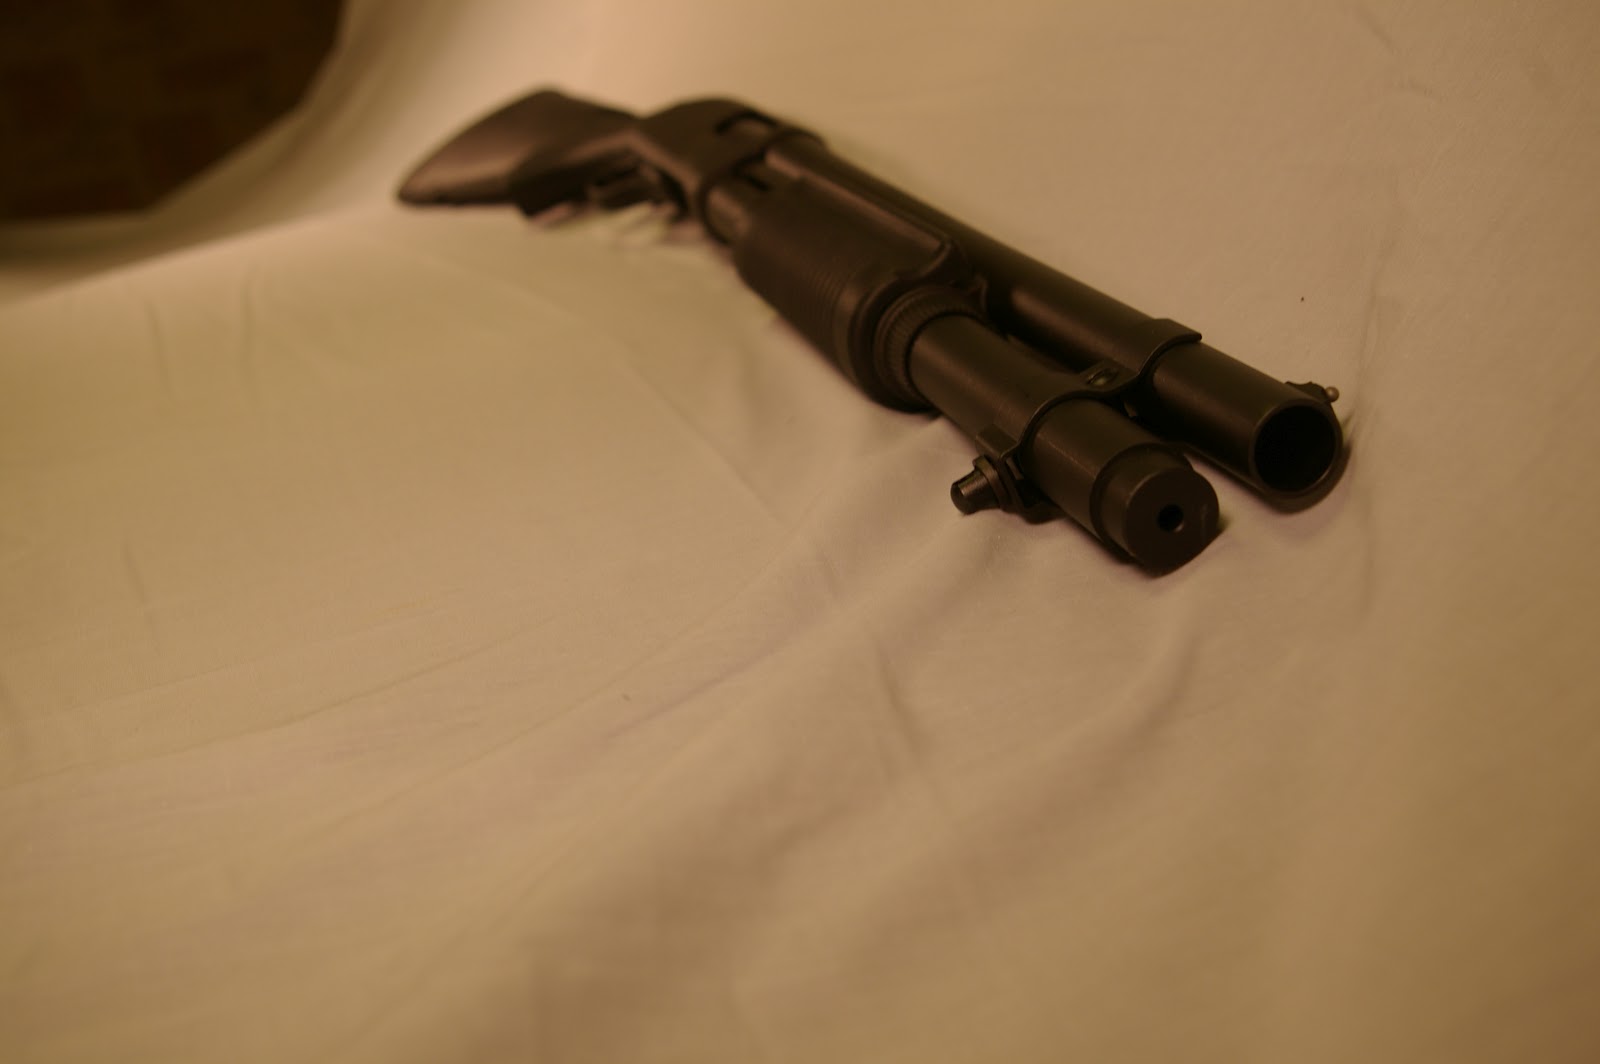
First impressions when I pulled it out of the box were positive. The original Remington box was solid, although it was cardboard, and the shotgun was held in place quite well through the use of a few styrofoam cutouts. Included in the box were very few items, basically just the shotgun itself, a trigger lock, and an owner's manual. Since this box wasn't sufficient for transporting the shotgun to/from the range, and it was large and bulky, I removed the contents and dropped it in the recycle bin. If it doesn't serve a purpose, it doesn't have a place in my home. Besides, it's an excuse to go spend more of my hard-earned money on a hard case for the Remington, which allows for a case review for The Low Ready, which directly benefits you, so I'm glad I tossed the box.
The shotgun itself is very well made, all of the parts fit together quite well. There isn't a whole lot of "slop" between the parts, so it doesn't have the same rattling noise that the Mossberg 500/590 tend to have. As with most people I know, my first instinct is to take the thing apart and figure out how it works. The design is similar to the Mossberg shotguns, disassembly is about a 2 on a 1-10 scale, while re-assembly is a 3. Overall, it's well-designed, and it's simplicity is likely the reason for the reliability this platform is known for.

At the range, I spent some time behind the trigger, shooting a variety of loads through the 870. To start off, I shot some 2 3/4" birdshot shells, then moved up to 2 3/4" 00 Buckshot, and finally ending with a few 3" Slugs. The Remington fired all rounds with no issues, and accuracy was as expected, right on target. I can't attest to long-range accuracy, however, since I was only shooting out to about 50 yards.
The Remington 870 was purchased to fill a void in my personal collection, it is my first (and currently my only) shotgun. When it's not at the range, it spends it's time doubling as a home defense weapon, which is out of sight and out of reach of children, yet easily accessible in the event that it is needed.

Stay tuned for disassembly videos, which will be uploaded to our YouTube page and embedded here within the next few months. As always, we want to hear your input! Leave us a comment here, on our Facebook page, or in an email.
New Photos-On The Way!
While I've been spending a lot of time focusing on the written content of the site, I have failed miserably at keeping the photographic content up-to-date. This is why, over the next few days, I will be updating most of the articles with some brand new content. I have set up a modest photography area in my kitchen, where I will be taking some high-resolution photographs of all of the gear we have reviewed. Well, not ALL of the gear we've reviewed, but everything we still have access to.
We are hoping the shift of focus (pun intended) toward the photographic side of things will supplement the content we already have. As they say, a picture is worth a thousand words. We're going to start letting the photos do some of the talking.
In other news, I will be revisiting some of the guns we've featured, including some new Range Reports and some updated reviews, after having spent some time with them. Our next feature will be of the Remington 870 Express 12 Gauge Shotgun, which I'm finishing up the photography for this evening.
Expect some new photographs in the following articles:
We are hoping the shift of focus (pun intended) toward the photographic side of things will supplement the content we already have. As they say, a picture is worth a thousand words. We're going to start letting the photos do some of the talking.
In other news, I will be revisiting some of the guns we've featured, including some new Range Reports and some updated reviews, after having spent some time with them. Our next feature will be of the Remington 870 Express 12 Gauge Shotgun, which I'm finishing up the photography for this evening.
Expect some new photographs in the following articles:
- First Look: Springfield XD45
- First Look: Beretta 92FS
- First Look: Kimber Eclipse Target II
- Review: Glock 21SF
- AR15 Pistols
- First Look: EOTech EXPS2-0
- First Look: Magpul PMAG
And of course, check back to read our take on the Remington 870, one of the most popular shotguns in the nation. As always, thanks for stopping in, and we look forward to providing you with more great reviews in the future! If you would like to see something featured that we haven't written about yet, please let us know! We are available on Facebook, by EMail, or by simply leaving a comment in the box below.
The Low Ready is One Year Old!
It's hard to believe that we've been at this for a year! Time sure does fly! Our first article was a "First Look" Review of the Sig Sauer P220, posted up on February 28, 2011. Click here to take a look!
In honor of our first year of writing, we are going to hold a Giveaway! The prize is your choice between a $25 Gift Card to Cabela's or a $25 Gift Card to Gander Mountain. Our prize drawing will be held once we reach 50 "likes" on our Facebook page, which can be seen by clicking HERE.
We are currently almost halfway to our goal of 50 "Likes", and we are hoping to meet that goal within 2 weeks.
We will be holding additional giveaways in the future, so be sure to let your friends know, and check back in to see what's going on here at The Low Ready!
In honor of our first year of writing, we are going to hold a Giveaway! The prize is your choice between a $25 Gift Card to Cabela's or a $25 Gift Card to Gander Mountain. Our prize drawing will be held once we reach 50 "likes" on our Facebook page, which can be seen by clicking HERE.
We are currently almost halfway to our goal of 50 "Likes", and we are hoping to meet that goal within 2 weeks.
We will be holding additional giveaways in the future, so be sure to let your friends know, and check back in to see what's going on here at The Low Ready!
Friday, March 2, 2012
The Art of Reloading (And Why You Should Start!)
This article is going to be rather short and concise. Anyone who considers themselves a true "firearms enthusiast" needs to consider reloading, if they aren't already set up to reload. The greatest benefit of reloading your own ammunition is the cost savings. You are re-using the brass that would otherwise be left at the range or tossed out, and simply replacing the primer, powder, and projectile with those of your choosing. If you buy in large enough quantities, you can save more than 50% of what you are already spending on ammunition, which will allow you to shoot more often, and we all know that shooting more often translates directly into improving your skills behind the trigger.
Enough with the benefits, let's get to business. The basic requirements to get started reloading are simple. You need a press, dies, powder measure, powder scale, brass (spent or new, it doesn't matter), and all of the "expendable" materials used in the actual process (powder, primers, and bullets).
There are plenty of kits out there to get you started, so I will go over the differences between the 3 main types of presses to begin. These are Single Stage Presses, Turret Presses, and Progressive Presses.
Single Stage: A Single Stage Press is usually the least expensive, but it also takes the most time to reload a round with this type. The press has a single hole for a single die, and you can only complete one step in the reloading process at a time, after which you have to manually remove the die and insert the next die before continuing. This may or may not be a drawback to you. The benefits of a Single Stage Press over the others are mainly economical, as this is by far the least expensive type of press to buy, and is often recommended for those who are just starting to reload, since it is simple to operate. Also, I've found that performing the same operation on a "batch" of ammunition requires more attention to detail, which aids in the learning experience.
As far as the cost goes, you can expect to spend between $100-$130 for a complete "kit" that includes a Single-Stage Press and everything else you'll need (except for dies) to get started. A decent set of dies will cost right around $30-$40 more. This is a great starting point, since you can upgrade everything one piece at a time, and for the most part, the individual components are compatible with other presses. For example, the dies are going to be the same for either type of press, the only thing that changes is the way the presses function.
Turret Presses: A Turret Press is the next step, and it improves the transition from one step in the reloading process to the next. With a Turret Press, all of your dies are mounted on a rotating "turret," and to move to the next step, you need only rotate the turret to the next die, and you are good to go. This changes the process a bit over a Single Stage Press, in that instead of performing the same step over and over on multiple shells, you can complete all of the steps, in order, on a single round without removing it from the press. Conversely, you can continue to reload in the same way as you would with a single stage, it's really up to you.
If you were to start out with a Single Stage Press, you can expect to spend right around $100 for a nice Turret Press, or you can start out with a Turret Press Kit, bypassing the Single Stage completely, for between $115-$150.
Progressive Presses: With a Progressive Press, things are much smoother. Instead of manually rotating the dies, a baseplate rotates the cases that are being reloaded, and every time you pull the handle, the process automatically advances. The beauty of a Progressive Press is the speed with which you are completing the cycle. From start to finish, going from a piece of cleaned brass to a complete round requires only a few seconds and a few pulls of a lever. Most of the higher-end Progressive Presses feature some nice accessories, like bullet feeders, case hoppers, primer feeders, and catch bins for the old primers and the complete rounds. If you've ever seen a Single Stage press side-by-side with a Progressive press, it's astounding just how different they are. The progressive press automatically feeds the brass, feeds the primers, measures the powder charge, feeds the bullet, and ejects the complete round after you finish doing the rest of the work. This requires much less effort, since you are essentially loading multiple rounds simultaneously, and the only function that you are required for is ensuring that the dies are properly set, and pulling on the lever. The rest of the procedure is handled by the press.
All of this added convenience and production power come at a price, however. The press alone will run you in the neighborhood of $250-$300 and up, with some models selling for $600+. If you were to buy a reloading kit that included a progressive press, you would be around $300-$350 for all of the components you'd need.
There are other options out there, including fully automated machines that will reload your ammunition without any interaction with you, but for a setup like that, you're looking at dropping considerable amounts of money, upwards of $3,000. It is not unheard of, nor difficult, to spend thousands of dollars on reloading supplies and equipment.
Either way you look at it, however, reloading not only saves you some money, but it allows you greater control over the type of ammunition you feed through your firearms, and it allows you to "tweak" the different variables with great precision to increase accuracy, performance, and reliability.
Stay tuned, we will be sharing a review of the Lee Anniversary Single-Stage Press Kit within the next couple of weeks, we have been putting it through it's paces for a while, and we are hoping to have some more information very soon.
Enough with the benefits, let's get to business. The basic requirements to get started reloading are simple. You need a press, dies, powder measure, powder scale, brass (spent or new, it doesn't matter), and all of the "expendable" materials used in the actual process (powder, primers, and bullets).
There are plenty of kits out there to get you started, so I will go over the differences between the 3 main types of presses to begin. These are Single Stage Presses, Turret Presses, and Progressive Presses.
Single Stage: A Single Stage Press is usually the least expensive, but it also takes the most time to reload a round with this type. The press has a single hole for a single die, and you can only complete one step in the reloading process at a time, after which you have to manually remove the die and insert the next die before continuing. This may or may not be a drawback to you. The benefits of a Single Stage Press over the others are mainly economical, as this is by far the least expensive type of press to buy, and is often recommended for those who are just starting to reload, since it is simple to operate. Also, I've found that performing the same operation on a "batch" of ammunition requires more attention to detail, which aids in the learning experience.
As far as the cost goes, you can expect to spend between $100-$130 for a complete "kit" that includes a Single-Stage Press and everything else you'll need (except for dies) to get started. A decent set of dies will cost right around $30-$40 more. This is a great starting point, since you can upgrade everything one piece at a time, and for the most part, the individual components are compatible with other presses. For example, the dies are going to be the same for either type of press, the only thing that changes is the way the presses function.
Turret Presses: A Turret Press is the next step, and it improves the transition from one step in the reloading process to the next. With a Turret Press, all of your dies are mounted on a rotating "turret," and to move to the next step, you need only rotate the turret to the next die, and you are good to go. This changes the process a bit over a Single Stage Press, in that instead of performing the same step over and over on multiple shells, you can complete all of the steps, in order, on a single round without removing it from the press. Conversely, you can continue to reload in the same way as you would with a single stage, it's really up to you.
If you were to start out with a Single Stage Press, you can expect to spend right around $100 for a nice Turret Press, or you can start out with a Turret Press Kit, bypassing the Single Stage completely, for between $115-$150.
Progressive Presses: With a Progressive Press, things are much smoother. Instead of manually rotating the dies, a baseplate rotates the cases that are being reloaded, and every time you pull the handle, the process automatically advances. The beauty of a Progressive Press is the speed with which you are completing the cycle. From start to finish, going from a piece of cleaned brass to a complete round requires only a few seconds and a few pulls of a lever. Most of the higher-end Progressive Presses feature some nice accessories, like bullet feeders, case hoppers, primer feeders, and catch bins for the old primers and the complete rounds. If you've ever seen a Single Stage press side-by-side with a Progressive press, it's astounding just how different they are. The progressive press automatically feeds the brass, feeds the primers, measures the powder charge, feeds the bullet, and ejects the complete round after you finish doing the rest of the work. This requires much less effort, since you are essentially loading multiple rounds simultaneously, and the only function that you are required for is ensuring that the dies are properly set, and pulling on the lever. The rest of the procedure is handled by the press.
All of this added convenience and production power come at a price, however. The press alone will run you in the neighborhood of $250-$300 and up, with some models selling for $600+. If you were to buy a reloading kit that included a progressive press, you would be around $300-$350 for all of the components you'd need.
There are other options out there, including fully automated machines that will reload your ammunition without any interaction with you, but for a setup like that, you're looking at dropping considerable amounts of money, upwards of $3,000. It is not unheard of, nor difficult, to spend thousands of dollars on reloading supplies and equipment.
Either way you look at it, however, reloading not only saves you some money, but it allows you greater control over the type of ammunition you feed through your firearms, and it allows you to "tweak" the different variables with great precision to increase accuracy, performance, and reliability.
Stay tuned, we will be sharing a review of the Lee Anniversary Single-Stage Press Kit within the next couple of weeks, we have been putting it through it's paces for a while, and we are hoping to have some more information very soon.
Thursday, March 1, 2012
"Like" Us on Facebook!
We are slowly building a fan base on Facebook, and our site is continuing to grow. The Low Ready is shifting things into high gear, we are going to be writing more firearm reviews, participating in more events, and even having a giveaway or two along the way! "Like" us on Facebook to enter in our first giveaway, because we are going to be handing one lucky winner a great prize when we hit 50 "likes"!
If you aren't on Facebook, leave us a comment below, let us know what you think! We are always looking for input, after all, we are doing this for you! If there is something you'd like to see reviewed, let us know, and we will do all we can to accomodate! We are always looking for new and unique ideas to improve our site and to bring you more great articles!
If you don't want to comment, but want your opinion heard, feel free to drop us a line at thelowready@gmail.com
If you aren't on Facebook, leave us a comment below, let us know what you think! We are always looking for input, after all, we are doing this for you! If there is something you'd like to see reviewed, let us know, and we will do all we can to accomodate! We are always looking for new and unique ideas to improve our site and to bring you more great articles!
If you don't want to comment, but want your opinion heard, feel free to drop us a line at thelowready@gmail.com
More Great Links!
This is just a quick update, we have come across a handful of great websites that you may enjoy, so please follow the links and check them out! These are sites that we frequent, and for good reason. These sites have a wealth of knowledge and are great places to have your questions answered! Thanks for visiting The Low Ready, and as always, stay tuned, there's much more to come!
-The Low Ready
Michigan Gun Rack
The Average Joe Survivalist
The High Road
Michigan Gun Owners
-The Low Ready
Michigan Gun Rack
The Average Joe Survivalist
The High Road
Michigan Gun Owners
Thursday, February 23, 2012
2012 AR15 Budget Build (The $500 "FrankenRifle")
With the current state of the economy here in the U.S., nearly everyone is cutting back on spending. Unfortunately, many of us are cutting back on "luxury items" like firearms, ammunition, range trips, accessories, and generally all aspects of recreational shooting. Since our target audience is a widely varied group of enthusiasts across a wide range of economic groups, we wanted to take some time to help bring the epitome of sport shooting into the hands of those with limited financial means.
In recent times, prices have come down a bit on AR15's, most notably the Palmetto State Armory AR15 kits, which contain everything (short of a stripped lower) needed to build your own AR15, all for around $500. Sure, there are other options out there, some cheaper, but the PSA kits have made quite an impact, and they are building quite a reputation.
That said, I'm going to attempt to build a functional, reliable AR15 rifle for less than the cost of this kit. I will be compiling some parts lists, including price info, in the coming weeks. This will obviously not be a "nail driver" or a match-grade rifle, but that's not what we're after. Reliability is the end goal. This rifle will feed ammo reliably, eject without mangling the brass, cycle properly, and not malfunction during normal use.
It must be noted, at the $500 price point, this isn't going to have high-quality optics mounted on it, it won't be loaded down with accessories, it's going to be a basic rifle. We are even considering using one of the many polymer lower receivers on the market. The parts used will be all new parts, nothing used or "leftover" from other builds, because honestly, this is my first AR15 "build", the others have been purchased assembled. At a $500 price point, you are getting a functional AR15 chambered in 5.56 NATO/.223 Remington at the same price as the same in a dedicated .22LR setup.
In the interest of full disclosure, the cheapest parts I've found are as follows:
In recent times, prices have come down a bit on AR15's, most notably the Palmetto State Armory AR15 kits, which contain everything (short of a stripped lower) needed to build your own AR15, all for around $500. Sure, there are other options out there, some cheaper, but the PSA kits have made quite an impact, and they are building quite a reputation.
That said, I'm going to attempt to build a functional, reliable AR15 rifle for less than the cost of this kit. I will be compiling some parts lists, including price info, in the coming weeks. This will obviously not be a "nail driver" or a match-grade rifle, but that's not what we're after. Reliability is the end goal. This rifle will feed ammo reliably, eject without mangling the brass, cycle properly, and not malfunction during normal use.
It must be noted, at the $500 price point, this isn't going to have high-quality optics mounted on it, it won't be loaded down with accessories, it's going to be a basic rifle. We are even considering using one of the many polymer lower receivers on the market. The parts used will be all new parts, nothing used or "leftover" from other builds, because honestly, this is my first AR15 "build", the others have been purchased assembled. At a $500 price point, you are getting a functional AR15 chambered in 5.56 NATO/.223 Remington at the same price as the same in a dedicated .22LR setup.
In the interest of full disclosure, the cheapest parts I've found are as follows:
- Lower Receiver: Palmetto State Armory Lower $79
- Lower Parts Kit: PSA Lower Incl. Trigger Group $50
- Buttstock: Mil-Spec 6-position buttstock/buffer tube $49
- Complete Upper: PSA forged upper 16" $309
- Bolt Carrier Group: PSA BCG (complete) $80
- Charging Handle: DPMS Charging Handle $15
- GRAND TOTAL: $582
As you can see, this is a difficult task. The reason for a complete upper rather than purchasing separate parts, is that a complete upper if assembled from parts would cost more than a fully assembled upper assembly, and I just can't come close to the same price point without cobbling the thing together with parts from different manufacturers. Not to mention, assembling an upper requires tools (barrel wrench, barrel blocks, vice, etc.) that would add to the overall cost of manufacture, and the point is to keep the price as low as possible for the average enthusiast. Assembling the parts isn't a bad option, and you could get the $499 kit from PSA and buy a $79 lower receiver, essentially building yourself a $578 AR15 from a well-known manufacturer, which may well be the better option.
I will be monitoring the stores and online retailers for lower prices on these parts, as well as examining additional options that haven't been considered yet. My ultimate goal is to get this thing build for under $500 total, not including FFL Transfer fee (for the lower) and shipping costs, but the more I research this project, the more daunting the task seems. Any suggestions will be well received, and I will be more than willing to answer any questions about the process throughout this project.
Updates will be posted periodically, as well as some new and exciting reviews that are in the works. We are currently working on a lower receiver for the CMMG .300AAC Blackout upper that we tested at the range last weekend, and we should have a couple new pistols to review within the coming weeks. Again, as I've mentioned before, due to budget constraints, the AR15 build that is the topic of this article will be a long-term project, completed as funds allow.
To ask a question, just leave a comment below, or if you prefer, send an email to us at thelowready@gmail.com and your questions will be answered as quickly as possible.
3/2/2012 UPDATE:
After doing some further research, it appears that our options are quite limited if we want to even come close to the $500 limit. Here is the updated parts list:
3/2/2012 UPDATE:
After doing some further research, it appears that our options are quite limited if we want to even come close to the $500 limit. Here is the updated parts list:
- Lower Receiver: New Frontier Polymer Lower $79
- Complete Upper: PSA forged upper 16" $309
- Bolt Carrier Group: PSA BCG (complete) $80
- Charging Handle: DPMS Charging Handle $15
- GRAND TOTAL: $483
As you can see, this is MUCH more cost-effective, and will allow us to at least purchase a magazine or two to feed some ammo through the rifle. The beauty of using a Polymer Lower is that the cost is substantially less than buying a Stripped Lower, Lower Parts Kit, and Buffer Tube/Buttstock separately, since the Polymer Lower includes all of this. It is truly a "plug-and-play" complete lower, which, in addition to keeping costs low, also helps keep the weight down, and increases the ease of assembly. This will not, however, allow for any type of accuracy, since we are using a PSA flat-top Upper, which does NOT include any kind of rear sight. Luckily for us, however, almost all of the Palmetto State Armory complete upper receivers come with a standard fixed front sight post, so we only need a rear sight to complete the package, which can usually be found relatively inexpensively. Just for the sake of this project, I'll toss in 2 of the least expensive GI magazines I can find, and a simple rear aperture sight to finish things off.
- Magazines: 2x Magpul Pmags @ $15/each $30
- Sights: Mil-Spec Detachable Carry Handle $18
- New Grand Total: $531
$531 for a fully-functional AR15 rifle, complete with 2 magazines and iron sights, is no small feat. We are going to try to knock the price down even more, I'd like to see the grand total WELL under $500, but I think we are already off to a great start.
Of course, there are some extra charges I'm not including here. Shipping & Handling, FFL Transfer fee (for the lower receiver), taxes, etc., aren't being included here, because let's face it, everyone touting Palmetto State Armory's Complete AR15 "Kit" doesn't include those costs in the price either. Not to mention, we will be combining shipping on everything we can. Not to worry, though, as we will openly share all of the costs involved in this build when it is completed. We will be looking for sales on parts we need, free shipping when available, and I'm even going to try to talk my local gun shop into completing the FFL Transfer for us at a discounted rate, in exchange for some free publicity on the Internet, mostly due to the sheer amount of money I spend in their establishment on a weekly basis.
More updates to come, including some pictures of the parts that will be ordered relatively soon. We are hoping to have a complete rifle within a month, and we will be sure to share pictures, Range Reports, and even a few "torture tests" to show you how well our "Franken-Rifle" fares against some heavy use (and abuse) both on the range and off. Stay tuned, this one is going to be fun!
3/13/2012 UPDATE:
Not much in the way of updates, but I did want to share a minor detail that is going to help cut the cost here. Instead of the PSA upper receiver, we have found the Cold Hand Arms upper receiver, which is built using a Del-Ton upper and a Mossberg 16" barrel. The total cost for the upper receiver is $299, which knocks another $10 off our most recent Grand Total. We've also given it some thought, and while 2 PMAGs may be just what the Doctor ordered, we are cutting it too close to our goal, and one mag will suffice to get us started. This is going to cut another $15 off of our Grand Total. We are always looking for additional ways to drop our price even more, so if you know of any prices that are lower than what we've listed this far, please let us know!
3/13/2012 UPDATE:
Not much in the way of updates, but I did want to share a minor detail that is going to help cut the cost here. Instead of the PSA upper receiver, we have found the Cold Hand Arms upper receiver, which is built using a Del-Ton upper and a Mossberg 16" barrel. The total cost for the upper receiver is $299, which knocks another $10 off our most recent Grand Total. We've also given it some thought, and while 2 PMAGs may be just what the Doctor ordered, we are cutting it too close to our goal, and one mag will suffice to get us started. This is going to cut another $15 off of our Grand Total. We are always looking for additional ways to drop our price even more, so if you know of any prices that are lower than what we've listed this far, please let us know!
- Complete Upper: CHA 16" Upper $299
- Magazine: 1x Magpul PMAG $15
- Newest Grand Total: $506
This is a lot closer, but we still need to cut the cost a bit more to cover shipping charges, FFL Transfer Fee for the Lower Receiver, and any other unexpected costs that may pop up along the way. Between shipping and FFL fees, I'm expecting our total cost will increase about $80, depending on whether we can combine shipping on some of these items or not. Overall, if we can cut our total price down to $420-$440, I think we may be able to make this happen for under $500.
Tuesday, February 14, 2012
Wednesday, February 8, 2012
First Look: Magpul PMAG
Although I wouldn't consider myself a hard-core "Survivalist," I do tend to keep a little extra food in the house, stock up on water, and I have pre-determined "minimum levels" of ammunition that I keep stocked up. This may be a great idea, but what is the point of an ammo stockpile if it's sitting in boxes in the bottom of the safe? I only had a handful of magazines for my AR-15, which is my go-to weapon for just about any "bump in the night" scenario. It was time to stock up.
Christmas is my favorite time of year. Every once in a great while, I get some great gifts from friends and family, rather than just getting stuck holding the bill for everything. Last year brought a great Christmas, and I became the owner of 10 new 30-round Magpul PMAGs.

Of course, the first thing I did was load an empty magazine into my AR. The fit was great, dropping the mag was easy, it didn't jam itself into the magwell, and the bolt locked to the rear as it should when an empty magazine is loaded and the charging handle pulled rearward.
After the "newness" wore off, I decided it was time to get them ready. The whole reason these were given to me was so I could have enough loaded magazines ready to go in an emergency situation. Between two of us, we were able to load all 10 magazines to capacity quite quickly. Each magazine loaded as smoothly as the last, and they all held exactly 30 rounds. Unlike standard GI magazines, there is no fitting an extra round or two in the PMAGs. This could be simply due to the fact that the GI mags I have are old, have been used and abused for years, and likely have some nicely broken-in follower springs. It could be because Magpul has tighter tolerances, and the design of the anti-tilt follower doesn't allow for any extra rounds. Either way, I digress.

After having owned these magazines for nearly two months, I have had the opportunity to run some rounds through them at the range. Nothing out of the ordinary, and the Magpul name has not been soiled. Magazines are really quite simple devices, it's much less common to have feeding problems with modern magazines than what you would have seen in decades past. Although the mags have all been fully loaded for about 6 weeks, during the last couple of trips to the range, the magazines did not cause any malfunctions. Loading the magazines into the rifle is smooth and easy, and from there, they are no different than the standard aluminum GI magazines many of you are used to. The size and shape is the same, although the PMAG is a little wider at the base, and feels a bit larger. They both weigh about the same. The PMAG is different in appearance, which is not a bad thing.
After the magazine is empty, the bolt locks to the rear, exactly as it should. Even after a couple hundred rounds through one magazine, on top of it having been kept loaded for over a month, the PMAG had no issues. Dropping the magazine from the rifle is also not a surprise. Nothing jams up, the mag drops, no issues whatsoever.
A feature that I have only ever noticed on the PMAG (and a couple of Magpuls competitors' products) is the included "dust cover." While it's a nice feature if you are just keeping the magazines stored somewhere, I find them to be somewhat unnecessary, and nothing more than a distraction if you find yourself in the middle of an emergency situation where you need to reload as quickly as possible. When we carried loaded magazines in the military, we didn't worry about dust getting into them. We kept them loaded, top-down in a load bearing vest or pouches on our body armor. No unnecessary steps, just 1) Remove magazine from pouch 2) Load magazine into rifle 3) Release bolt catch. Too easy. This isn't to say some shooters may not have a use for them, they do snap into place on the bottom side of the magazine when not in use. I simply choose to leave them in the safe. I may use them on unloaded magazines in the future, but I fail to see the necessity.

Overall, 6-8 weeks is not really enough time to put a product like this through it's paces and offer a solid review. I will update this article as I spend more time and put more rounds through these magazines, but I will offer my opinions up to this point.
A magazine is a magazine. It's hard to screw up a design that's been in use for upwards of 40 years (referring to the AR15 only at this point, although PMAGs are available for other rifles and calibers). The folks at Magpul kept to the original design, with a few minor changes. There have been a few variations in the design of the followers used, the most recent referred to as a "true anti-tilt follower." The appearance is different than what you may be used to seeing. The construction is polymer, and the magazines are easily taken down for cleaning, replacing springs/followers, or adding accessories (like ranger floorplates and the like). Overall, I like the aesthetics, they match the color of most AR15s better than the grey GI mags, they go well with all the other polymer accessories you see on ARs these days, and if you decide to buy all Magpul furniture, they compliment each other nicely.

Stay tuned for updates and pictures, as we will be revisiting this post in the future to discuss such topics as long-term storage, excessive use, cycling magazines, and more.
Christmas is my favorite time of year. Every once in a great while, I get some great gifts from friends and family, rather than just getting stuck holding the bill for everything. Last year brought a great Christmas, and I became the owner of 10 new 30-round Magpul PMAGs.

Of course, the first thing I did was load an empty magazine into my AR. The fit was great, dropping the mag was easy, it didn't jam itself into the magwell, and the bolt locked to the rear as it should when an empty magazine is loaded and the charging handle pulled rearward.
After the "newness" wore off, I decided it was time to get them ready. The whole reason these were given to me was so I could have enough loaded magazines ready to go in an emergency situation. Between two of us, we were able to load all 10 magazines to capacity quite quickly. Each magazine loaded as smoothly as the last, and they all held exactly 30 rounds. Unlike standard GI magazines, there is no fitting an extra round or two in the PMAGs. This could be simply due to the fact that the GI mags I have are old, have been used and abused for years, and likely have some nicely broken-in follower springs. It could be because Magpul has tighter tolerances, and the design of the anti-tilt follower doesn't allow for any extra rounds. Either way, I digress.

After having owned these magazines for nearly two months, I have had the opportunity to run some rounds through them at the range. Nothing out of the ordinary, and the Magpul name has not been soiled. Magazines are really quite simple devices, it's much less common to have feeding problems with modern magazines than what you would have seen in decades past. Although the mags have all been fully loaded for about 6 weeks, during the last couple of trips to the range, the magazines did not cause any malfunctions. Loading the magazines into the rifle is smooth and easy, and from there, they are no different than the standard aluminum GI magazines many of you are used to. The size and shape is the same, although the PMAG is a little wider at the base, and feels a bit larger. They both weigh about the same. The PMAG is different in appearance, which is not a bad thing.
After the magazine is empty, the bolt locks to the rear, exactly as it should. Even after a couple hundred rounds through one magazine, on top of it having been kept loaded for over a month, the PMAG had no issues. Dropping the magazine from the rifle is also not a surprise. Nothing jams up, the mag drops, no issues whatsoever.
A feature that I have only ever noticed on the PMAG (and a couple of Magpuls competitors' products) is the included "dust cover." While it's a nice feature if you are just keeping the magazines stored somewhere, I find them to be somewhat unnecessary, and nothing more than a distraction if you find yourself in the middle of an emergency situation where you need to reload as quickly as possible. When we carried loaded magazines in the military, we didn't worry about dust getting into them. We kept them loaded, top-down in a load bearing vest or pouches on our body armor. No unnecessary steps, just 1) Remove magazine from pouch 2) Load magazine into rifle 3) Release bolt catch. Too easy. This isn't to say some shooters may not have a use for them, they do snap into place on the bottom side of the magazine when not in use. I simply choose to leave them in the safe. I may use them on unloaded magazines in the future, but I fail to see the necessity.

Overall, 6-8 weeks is not really enough time to put a product like this through it's paces and offer a solid review. I will update this article as I spend more time and put more rounds through these magazines, but I will offer my opinions up to this point.
A magazine is a magazine. It's hard to screw up a design that's been in use for upwards of 40 years (referring to the AR15 only at this point, although PMAGs are available for other rifles and calibers). The folks at Magpul kept to the original design, with a few minor changes. There have been a few variations in the design of the followers used, the most recent referred to as a "true anti-tilt follower." The appearance is different than what you may be used to seeing. The construction is polymer, and the magazines are easily taken down for cleaning, replacing springs/followers, or adding accessories (like ranger floorplates and the like). Overall, I like the aesthetics, they match the color of most AR15s better than the grey GI mags, they go well with all the other polymer accessories you see on ARs these days, and if you decide to buy all Magpul furniture, they compliment each other nicely.

Stay tuned for updates and pictures, as we will be revisiting this post in the future to discuss such topics as long-term storage, excessive use, cycling magazines, and more.
Subscribe to:
Posts (Atom)